Monday, September 29, 2008

My Mummy Tutorial


This Tutorial was written on Sept. 28, 2008. Called "My Mummy" & can be found at my Tutorial group here.
I used 3 scrapkits by WimpyChompers,you can purchase them here. They are Halloween Darlings -Elements, Word Art & Paper.
I'm showing this with 2 different tubes & wordart.

Pretty In Pink Tutorial


This Tutorial was written on Sept. 27, 2008. Called "Pretty In Pink" & can be found at my Tutorial group here.

Scrapkit by Monti here. It's called "Monti's Pink and Black Scrap Kit".

Friday, September 26, 2008

Wicked Tutorial


This Tutorial was written on Sept. 26, 2008. Called "Wicked" & can be found at my Tutorial group here.
Scrapkit by Kristin's Wicked Scrapz here. It's called "Darkness".

Raven Beauty Tutorial


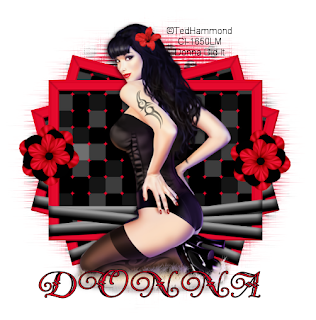
This Tutorial was written on Sept. 18, 2008. Called "Raven Beauty" & can be found at my Tutorial group here.
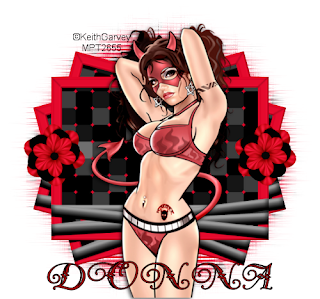
Scrapkit by Scrappy Lippy. You can purchase it here, it's called "Devil Me Care".

I did this with several different tubes.


Welcome To My Garden Tutorial


This Tutorial was written on Sept. 19, 2008. Called "Welcome To My Garden" & can be found at my Tutorial group here.
Scrapkit by Missy here, it's called "Happy Garden".

Jail Bird Tutorial


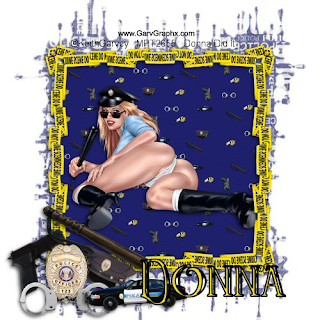
This Tutorial was written on Sept. 18, 2008. Called "Jail Bird" & can be found at my Tutorial group here.
Scrapkit by Candy here, it's called "Jailbird".

Rainy Days And Mondays Tutorial


This Tutorial was written on Sept. 16, 2008. Called "Rainy Days And Mondays" & can be found at my Tutorial group here.

Scrapkit by noreimerreason here, called Rainy Days & Mondays.

Life On The Farm Tutorial


This Tutorial was written on Sept. 14, 2008. Called "Life On The Farm" & can be found at my Tutorial group here.
2 Scrapkits used. They are by Scrappy Lippy at Sweet N Sassy Digiscrappers. You can purchase them here, they are "Down On The Farm" & "Down On The Farm Add On".

Voodoo Magic Tutorial


This Tutorial was written on Sept. 13, 2008. Called "Voodoo Magic" & can be found at my Tutorial group here.
Scrapkit by Sophisticat Simone Scrapkits here. It's called Voodoo.

Good Afternoon

I hope you all are having a pleasant Friday.
I will try to get the rest of my Tutorials up as soon as possible.
You can find me at my Tutorial group here or my PSP group here.

Thursday, September 25, 2008

Have A Spooktacular Halloween Tutorial


This Tutorial was created on Sept. 12/08
I am using Paint Shop Pro 8.
I used the wonderful artwork of Misty Benson.
You can purchase her tubes at MPT.
Scrapkit Midnight Blues here.


Font used was "Art Nouveau Caps".

Let's begin by opening a new image 600x600

Floodfill white

Resize Blueblocked paper to 20 & add as a new layer. Then use the mask of choice.

Resize Frame 2 from the kit & add as a new layer. Give it a drop shadow of choice.

Add your tube or tubes (by the same artist) & give them a drop shadow of choice.

Add whatever other embellishments you'd like. Give them all a dropshadow of choice.

Add a saying of choice to your tag.

Add the artist's copyright & your name.


Merge All layers &
Save as png & you're done.

Thanks for trying my tutorial.

This Tutorial is registered with


Too Hot Tutorial


This tutorial was created on Sept. 12/08
I am using Paint Shop Pro 8.
I used the wonderful artwork of Monte M. Moore. You can purchase his tubes at CILM.
Scrapkit by WimpyChompers here. It's called "Heroes Never Die".

No other Supplies Needed

Font used was "Tall Paul"

Let's begin by opening a new image 600x600

Floodfill white

Use one of the papers from the kit resized to 20 & add as a new layer.
Use mask of choice.

Using your preset tool, rounded rectangle, make sure you check off anti-alias & create as vector, width-5.00, miter limit-10 draw out the rectangle to fit like mine.

Use a color that will go well with your tube.

Using your Magic wand click inside the rectangle.
Expand by 2.
Then using a paper of choice,
copy & paste as new layer.
I resized my paper to 15.

Then resize the word art to 10 & copy as a new layer. Put it into your rectangle. Then resize the firetruck to 10 & add it below the word art in the rectangle. Give it a drop shadow of choice.

Add the fire hydrant as a new layer, resize to 10.
Give it a drop shadow of choice.

Using the crop tool pick 2 pair of the boots, resize to 35 & add as a new layer.
Give them a drop shadow of choice.

Add your tube as a new layer & give it a drop shadow of choice.

Add the artist's copyright & your name.

Save as png & you're done.

Thanks for trying my tutorial.

This Tutorial is registered with


Fire Gal Tutorial


This tutorial was created on Sept. 11/08.
I am using Paint Shop Pro 8.
I used the wonderful artwork of Gary Ham. You can purchase his tubes at CILM.
Scrapkit by WimpyChompers here. It's called "Heroes Never Die".

No other Supplies Needed
Font used was "Hot Hot Hot Burning"

Let's begin by opening a new image 500x500

Floodfill white

Use one of the papers from the kit resized to 15 & add as a new layer.
Use mask of choice.

Add the Firetruck as a new layer. Give it a dropshadow of choice.

Add your tube as a new layer & give it a drop shadow of choice.

Add the fire hydrant as a new layer, resize to 7.
Give it a dropshadow of choice.

Using the crop tool pick 2 pair of the boots, resize to 25 & add as a new layer.
Give them a dropshadow of choice.

Add the artist's copyright & your name.

Save as png & you're done.

Thanks for trying my tutorial.

This Tutorial is registered with


Under Arrest Tutorial


This tutorial was created on Sept. 9/08
I am using Paint Shop Pro 8.
I used the wonderful artwork of Keith Garvey.
You can purchase his tubes at MPT.
Scrapkit by Queen Brat Designs here. It's called "It's The Law Ma'am".

No other Supplies Needed

Font used was "Watson"

Let's begin by opening a new image 500x500

Floodfill white

Use one of the papers from the kit resized to 20 & add as a new layer.
Use mask of choice.

Next use one of the frames from the kit. Resize to 12 & add as a new layer.

Using your magic wand click inside the frame.
Expand by 3.
Then choice another paper of choice, resize to 15 then
copy & paste as new layer,
Selections, invert, delete, select none.
Give the frame a drop shadow of choice.
I resized this paper 15%.
Move this layer below the frame layer.


Add your tube & give it a drop shadow of choice. Drop it below the frame layer.

Choose whatever other embellishments you want, resize as needed & give each of them a drop shadow of choice.

Add the artist's copyright & your name.

Save as png & you're done.

Thanks for trying my tutorial.


This Tutorial is registered with


Totally Clueless Tutorial


This tutorial was created on Sept. 9/08
I am using Paint Shop Pro 8.
I used the wonderful artwork of Gary Ham. You can purchase his tubes at CILM.
Scrapkit by Queen Brat Designs here. It's called "It's The Law Ma'am".

No other Supplies Needed

Font used was "Watson".

Let's begin by opening a new image 500x500

Floodfill white

Use one of the papers from the kit resized to 20 & add as a new layer.
Use mask of choice.

Next use one of the frames from the kit. Resize to 12 & add as a new layer.

Using your magic wand click inside the frame.
Expand by 3.
Then choice another paper of choice, resize to 15 then
copy & paste as new layer,
Selections, invert, delete, select none.
Give the frame a drop shadow of choice.
I resized this paper 15%.
Move this layer below the frame layer.


Add your tube & give it a drop shadow of choice. Drop it below the frame layer.

Choose whatever other embellishments you want, resize as needed & give each of them a drop shadow of choice.

Add the artist's copyright & your name.

Save as png & you're done.

Thanks for trying my tutorial.

This Tutorial is registered with


Ms. Freddy Kreuger Tutorial


This tutorial was created on Sept. 8/08.

I am using Paint Shop Pro 8.
I used the wonderful artwork of Dave Nestler.
You can purchase his tubes at CILM.
Scrapkit available from Sharon Becker Creations here, under Freebies.
Frame by TwinkyDezines here.

No Other Supplies Needed

Font I used was "In The City".

Let's begin by opening a new image 700x700
You can resize later.

Floodfill white

Copy & Paste a Paper of choice.
Then use a mask of choice.


Copy & Paste one of Twinkys Frames of choice as a new layer.
Using your Magic wand click inside the Frame.
Expand by 25.
Then choice another paper of choice,
copy & paste as new layer,
Selections, invert, delete, select none.
Give the frame a drop shadow of choice.
I resized this paper 50%.
Move this layer below the frame layer.


Add a tube of Choice.
Add it under the frame layer.
Give the tube a drop shadow of choice.

Add word of choice.
I Rotated mine 25 left.
Give it a drop shadow of choice.

Add the artist's copyright & your name.

Save as png & you're done.

Thanks for trying my tutorial.

This Tutorial is registered with


Good Girls Gone Bad Tutorial


This Tutorial was created on Sept. 8/08.
I am using Paint Shop Pro 8.
I used the wonderful artwork of Keith Garvey. You can purchase his tubes at MPT.
Scrapkit by Clarey here, called Berry Blush.

Supplies Here
Font used was "Douglas Adams Hand".

Let's begin by opening a new image 500x500

Floodfill white

Use a paper of choice, add as a new layer. Then use the mask provided.

Using your preset tool, select Eclipse draw out a circle to whatever size you would like. Make sure Anti-Alias & Create as Vector are checked, width 5.
Use a color that will go well with your tube.


Using your Magic wand click inside the circle.
Expand by 2.
Then using a paper of choice,
copy & paste as new layer,
Selections, invert, delete, selections, none.
I resized my paper to 55.

Resize the 2 Berry Blush flowers to 25.
Add them around the circle as in my tag.
Give each one a drop shadow of choice.

Using the journal tab from the kit add whatever saying you would like to it. Merge visible.
I resized mine to 55.
Resize the butterfly to 15 add to one side of your journal tab, mirror & add another to the other side of the journal tab. Merge all visible.
Add as new layer & position as in my tag under the flower layers.
Give it a drop shadow of choice.


Add 2 tubes of Choice from the same artist.
Give both tubes a drop shadow of choice.

Add the artist's copyright & your name.


Merge All layers &
Save as jpg & you're done.

Thanks for trying my tutorial.

This Tutorial is registered with


House Of Frightmares Tutorial


This tutorial was created on Sept. 7/08.
I am using Paint Shop Pro 8.
I used the wonderful artwork of Ted Hammond. You can purchase his tubes at CILM.
Scrapkit by VooDoo4u2nv here.

No other Supplies Needed

Font used was "Hurricane Supa Dupa Serif".

Let's begin by opening a new image 700x700
You can resize later.

Floodfill white

Add a new layer, floodfill black.
Use mask of choice.

Copy & Paste Spiderweb3.
Give it a drop shadow of choice.

Copy & Paste the house, resize to 75%.
Give it a drop shadow of choice.

Copy & Paste the WordartBat & resize to 55%.
Give it a drop shadow of choice.

Copy & paste the tree & place it beside the house.
Give it a drop shadow of choice.

Add your tube & give it a drop shadow of choice.

Choose whatever other embellishments you want & give each of them a drop shadow of choice.

Add the artist's copyright & your name.

Save as png & you're done.

Thanks for trying my tutorial.

This Tutorial is registered with


An Apple For Teacher Tutorial

This tutorial was created on Sept. 5/08.
I am using Paint Shop Pro 8.
I used the wonderful artwork of Suzanne Woolcott. You can purchase her tubes here.
Scrapkit available from Cinnamon Scraps here, under Freebies- Back To School

No other Supplies Needed.
Font I used was "GMAFF Shit".

Let's begin by opening a new image 700x700
You can resize later.

Floodfill white

Copy & Paste a Paper of choice.
I resized mine to 25%
Then use a mask of choice.

Copy & Paste the CS_Backtoschool frame 2 as a new layer.
Using your Magic wand click inside the Frame.
Expand by 3.
Then choice another paper of choice,
copy & paste as new layer,
Selections, invert, delete, select none.
Give the frame a drop shadow of choice.
I resized this paper 15%.
Move this layer below the frame layer.


Add a tube of Choice.
Add it under the frame layer.
Give the tube a drop shadow of choice.

Add any embellishments you would like.
Give them each a drop shadow of choice.

Add the artist's copyright & your name.

Save as png & you're done.

Thanks for trying my tutorial.

This Tutorial is register with


Racer Babe Tutorial


This Tutorial was created on Sept. 5/08.
I am using Paint Shop Pro 8.
I used the wonderful artwork of Michael Landefeld. You can purchase his tubes at CILM.
Scrapkit by MoMo here, it is a PTU kit called "Racing Fever".
Font used is Hot Rod Gang BV
No other Supplies Needed

Let's begin by opening a new image 700x700
You can resize later.

Floodfill white

Copy & Paste a Paper of choice.
Then use a mask of choice.

Copy & Paste the Racing Fever Tire as a new layer.
Using your Magic wand click on each area inside the Tire.
Expand by 3.
Then choice another paper of choice,
copy & paste as new layer,
Selections, invert, delete, selections, none.
Give the tire a drop shadow of choice.

Copy & Paste the Flags from Michael Landefeld's Pitcrew tube
(or flags of your choice)
Give it a drop shadow of choice.

Add a tube of Choice by Michael Landefeld if you use his Flags.
Otherwise any tube of choice.
Give the tube a drop shadow of choice.

Add the artist's copyright & your name.


Merge All layers &
Save as png & you're done.

Thanks for trying my tutorial.

This Tutorial is registered with